
Automate Database Builds Part Two: Extract Database Structure for Visual Studio Solution
Automate Database Builds Part One: Extract DacPacs Using PowerShell Via sqlpackage.exe Automate Database Builds Part Two: Extract Database Structure for Visual Studio Solution Automate Database Build Part Three: Create a Database Publish Profile
I’m writing a blog on database deployment (currently still in draft form), and I need a database to show my examples with. This required me to download AdventureWorks 2012 and the corresponding solution for Visual Studio 2012. After some fruitless Googling, I surmised that the Visual Studio sln was not available to download. So I turned to Visual Studio 2012 to extract the schema and create a solution. So below in this example I am going to show you how to extract the AdventureWorks 2012 solution for Visual Studio 2012 either from a live database or a DACPAC. It was seriously easy to do, but there are a few options that you should consider when extracting a real live production database:
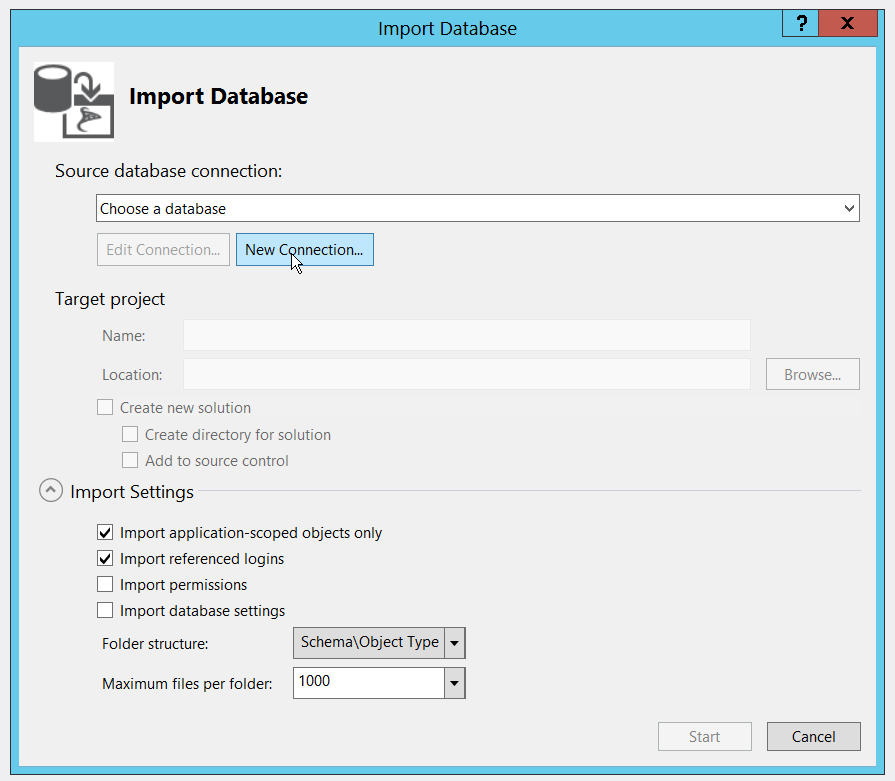
The Import Wizard offers four options for a folder structure:
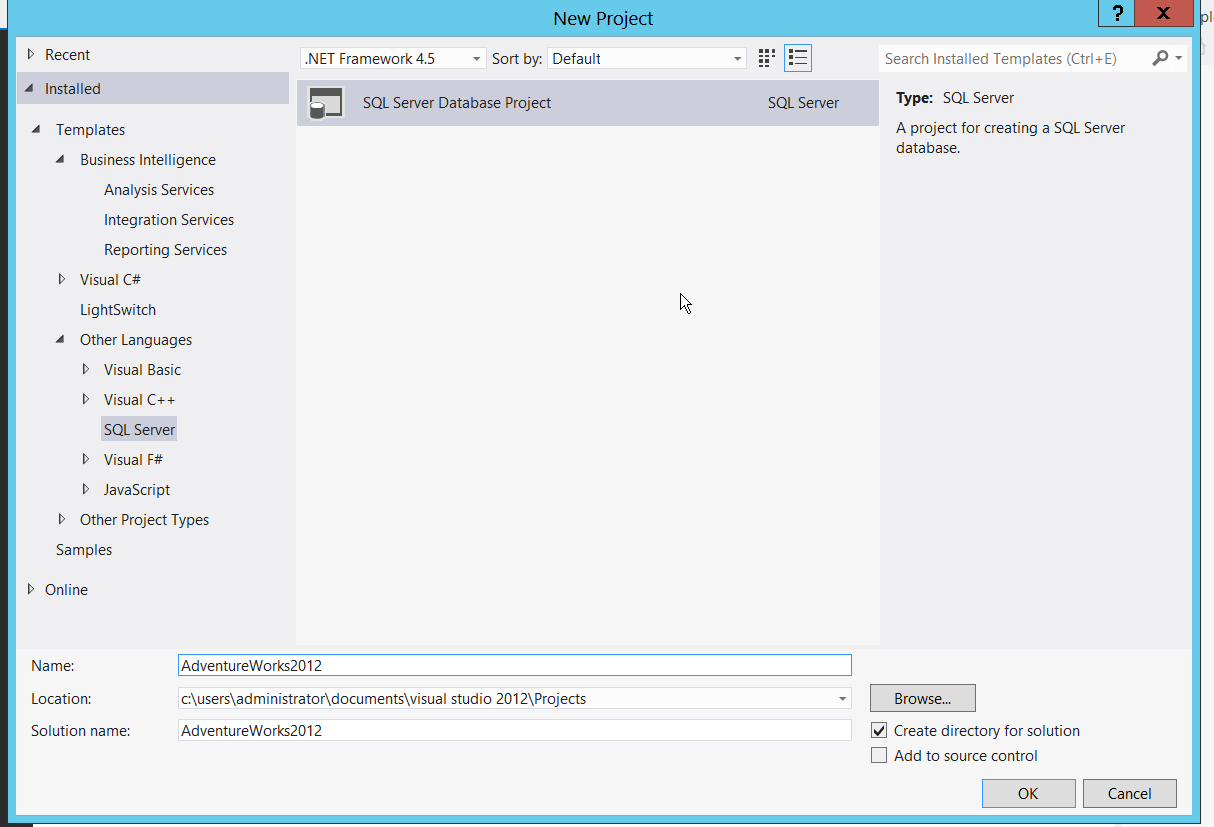
Naming the solution after the database might be a little myopic if you plan to add more database solutions later, but it doesn’t really matter here. Once this is created click on the database project and go to Import>Database.
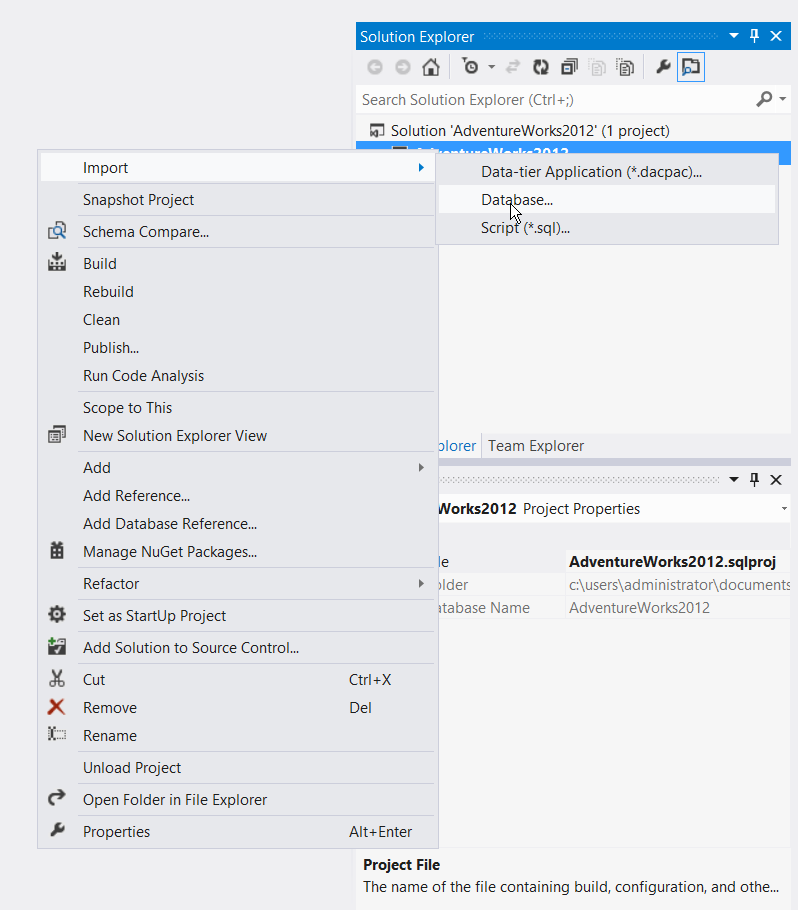
From here you can select your databse from the drop down box. If you have not connected to the instance before then you need to add a new connection.
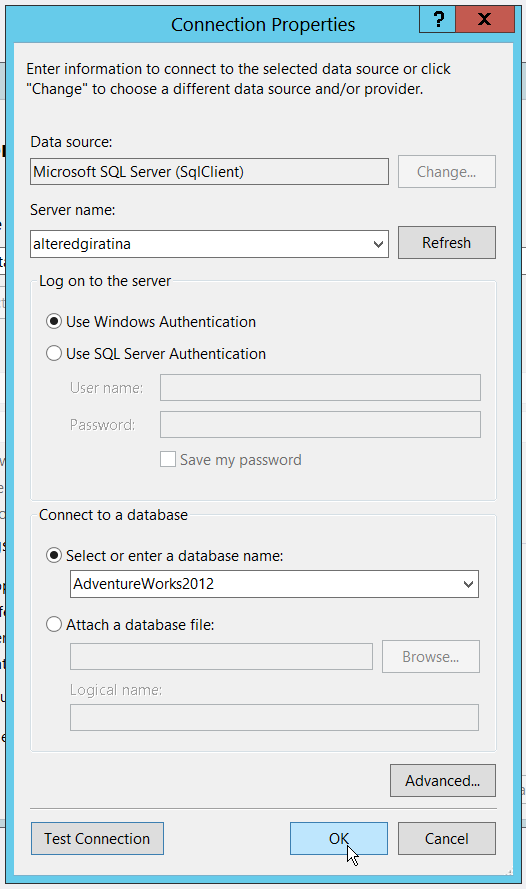
Here you select the database server, your connection properties, and select your database and click OK.
Now we come to the Import Settings. It is worth noting that, unlike the previous Data Dude projects, selecting a folder-structure for the Visual Studio 2012 SSDT project, is only required for the familiarity, readability, and maintainability of the solution. The structure has no bearing on the deployment, and does not influence anything in the database structure.
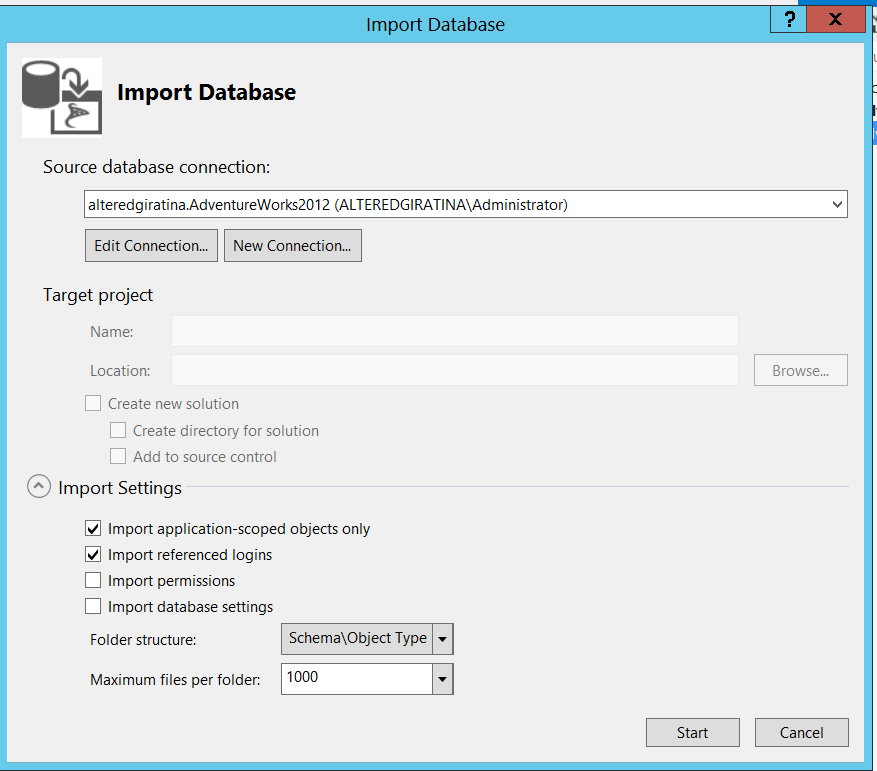
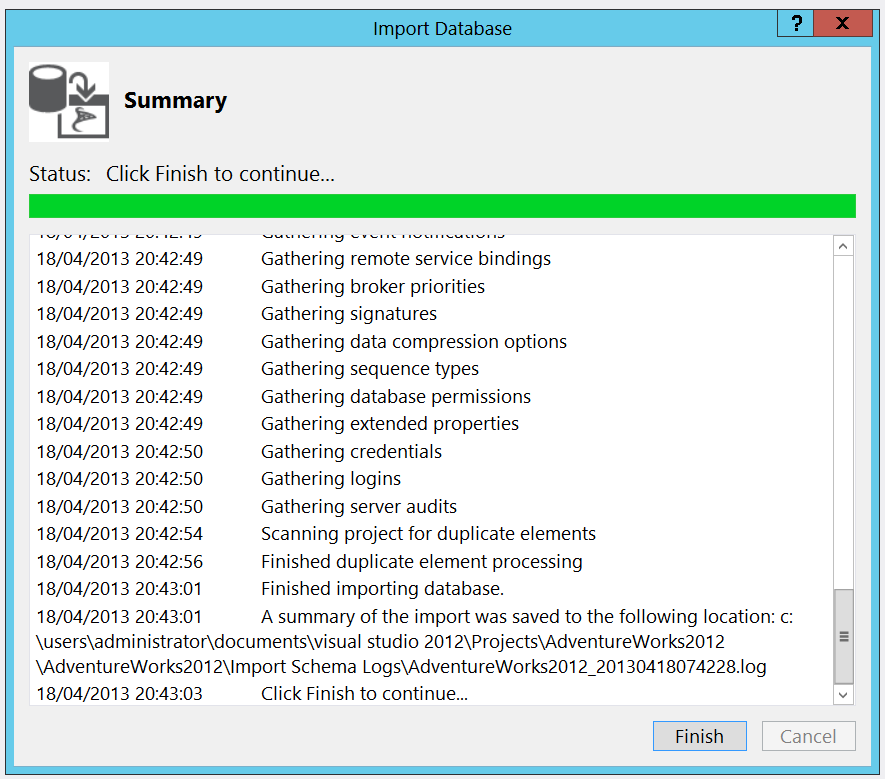
Once you’ve selected your folder structure, you’re ready to import. Depending on the size and complexity of your solution, it shouldn’t take long. Once finished click OK.
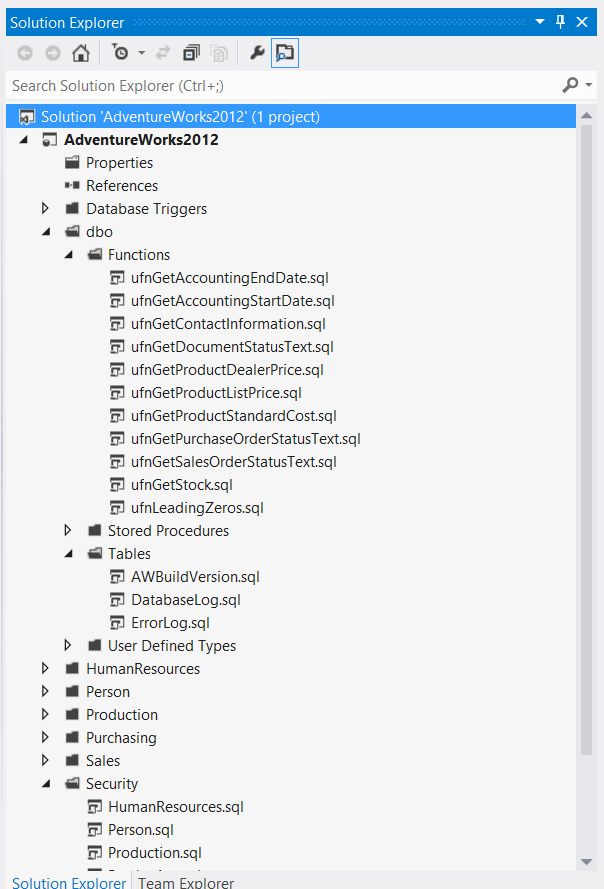
Browse your solution and you’ll see your project imported in the folder structure you requested that you will be able to deploy.
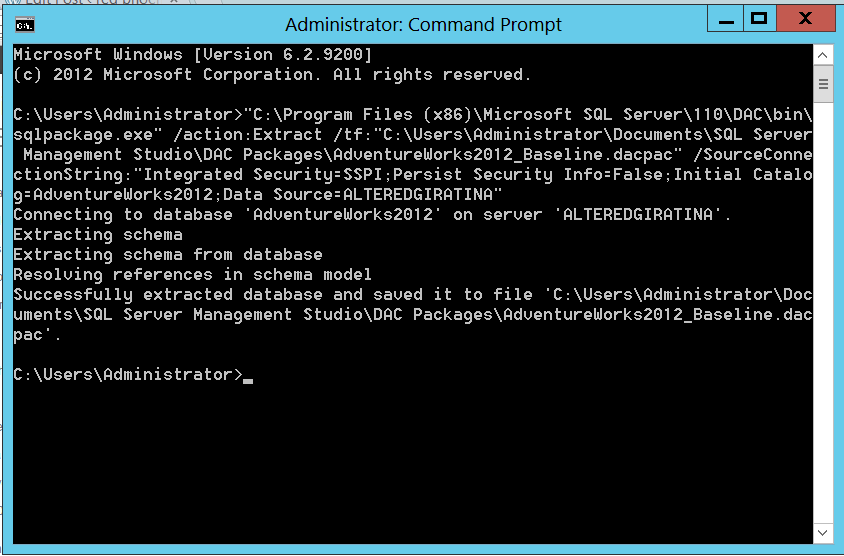
"C:\Program Files (x86)\Microsoft SQL Server\110\DAC\bin\sqlpackage.exe" /action:Extract /tf:"C:\Users\Administrator\Documents\SQL Server Management Studio\DAC Packages\AdventureWorks2012_Baseline.dacpac" /SourceConnectionString:"Integrated Security=SSPI;Persist Security Info=False;Initial Catalog=AdventureWorks2012;Data Source=ALTEREDGIRATINA"
The paramters we choose to extract a DACPAC are straightforward in this case, but might be more complex, depending on your SQL setup. Read up on SQLPaxkage in greater detail on the MSDN page.
http://msdn.microsoft.com/en-us/library/hh550080(v=vs.103).aspx
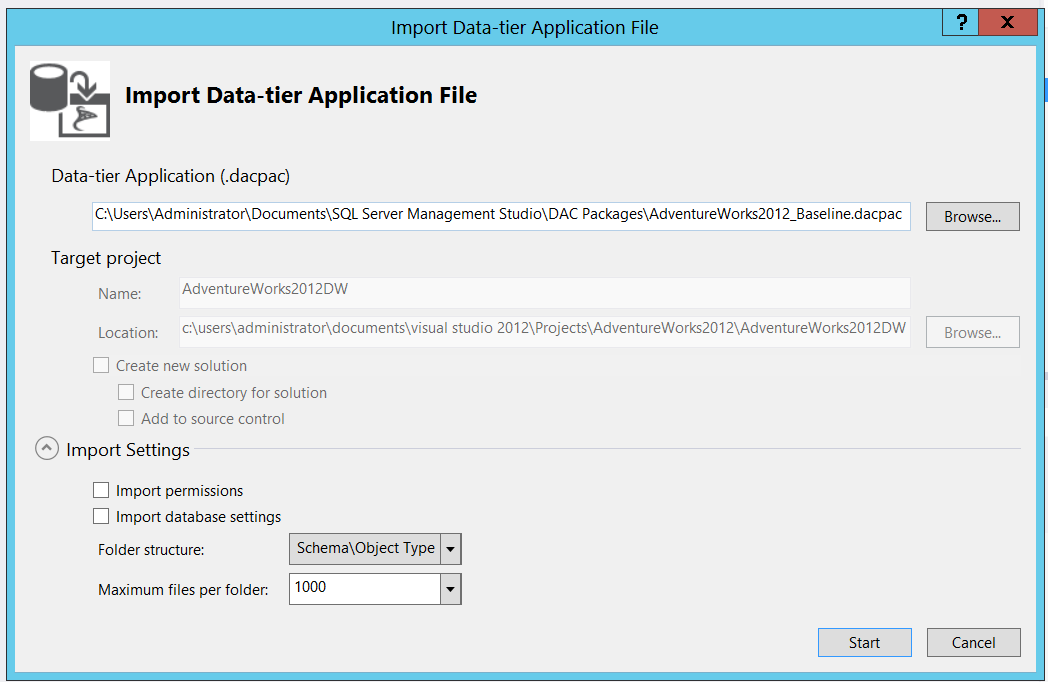
The choices here are far more straightforward: select the dacpac you extracted, choose your Import Settings and hit “start”.
